DIY Beaded Friendship Bracelets
Affiliate notice: I only suggest items I’ve personally used, plan to purchase, or would recommend to my dearest friends. If you purchase through my links, I may earn a small commission (at no extra cost to you).
In this article, I will guide you through the process of making an elastic stretch cord friendship bracelet. These Taylor Swift-inspired bracelets are trendy and versatile, allowing you to spell out phrases or names of friends. The best part is that they don't require a clasp and can be easily layered for a cute look. While the process may seem straightforward, there are a few tips and tricks that will help you create a secure bracelet that you can confidently gift or wear yourself. So, let's head over to the craft table and take a look at the supplies we'll be using.
Supplies
Beads (including letter beads, spacer beads, and clay beads)
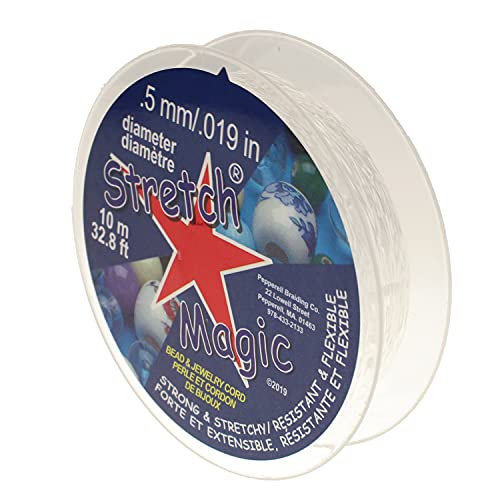
Elastic string (I love 0.5mm Stretch Magic String)
Small sewing scissors (regular household scissors work, too)
Optional: Jewelry glue (I love Hypo Cement)
Optional: Dark material, such as black cardstock, for beading surface
Table of Contents Show
Steps
Organizing Your Beads
If you're using alphabet beads, it's best to purchase them pre-organized in compartments. This will save you the hassle of searching for specific letters in a jumbled assortment. Additionally, it's helpful to plan out your pattern or design before starting to ensure you’re thrilled with the final result. Peruse this Pinterest board for inspiration!
Measuring and Preparing the String
To begin, place a dark material on your work surface so it’s easier to see the clear elastic string. Unspool your elastic string and grab a ruler. Refer to a handy chart to determine the number of inches you'll need for the bracelet size you want. For example, an adult size small typically requires approximately seven inches of string.
Important: Give yourself enough slack to work with! Leave about two inches on either side of your string when you cut it. This extra slack allows for easier tying at the end.
Pre-Stretching the Elastic
Before beading, it's crucial to pre-stretch your elastic string. This step ensures that your bracelet won't become saggy over time. To do this, evenly stretch the string inch by inch, pulling it tight.
Securing the String
Next, grab a bead holder or binder clip and open it. Take one end of the string and place it into one of the rungs or clasps of whichever holder option you’re using. This will keep the beads in place as you string them.
Stringing the Beads
Now it's time to start stringing the beads onto the bracelet. I like to begin with colorful clay beads, which I thread onto the elastic string until I’ve reached about a quarter of the way down the string.
Tip: If you're having trouble picking up the tiny clay beads, you can moisten the pad of your finger tip and press directly over top of the bead.
Adding Spacer Beads and Letter Beads
To add some variety and design to your bracelet, incorporate spacer beads and letter beads. Choose a spacer bead, and string it onto the bracelet next to your clay beads. Then, string the letter beads to spell out your desired word or phrase.
Important: Start with the final letter and work your way backwards to ensure the correct orientation when the bracelet is worn.
Creating Symmetry
For a balanced design, add another spacer bead on the other side of the completed word or phrase. Then, thread more colorful clay beads onto the elastic string until you have about a thumb’s length of unbeaded string left.
Tying the Bracelet
Now it's time to tie the bracelet and secure it. Many beaders use what’s known as the surgeon’s knot—personally, however, I find it tricky! Here’s my preferred, easier method:
Start by crossing the left end of the string over the right end.
Loop the left end underneath the right end.
Create a “normal knot” and tighten.
With the excess string, loop both ends around your fingers, and tie as if you’re tying a balloon.
Tighten the knot as much as possible and hold it tightly.
Trimming Excess String
Once the knot is secure, trim the excess string, up to the knot, using scissors. Tuck the knot beneath the beads to create a clean finish.
Optional: Adding Glue for Extra Security
If you want to ensure extra security for your bracelet, you can use jewelry glue with a fine point nozzle. Apply a small amount of glue directly to the knot and let it rest for about an hour.
And there you have it! Your elastic stretch cord friendship bracelet is complete!
Final Thoughts
I hope this guide has inspired you to start making your own elastic stretch cord friendship bracelets. It's a simple yet fulfilling project that anyone can enjoy. So gather your materials, set up your crafting space, and let your creativity flow. Happy beading!
DIY Beaded Bracelet Tips for Beginners
Plan Your Design: Always plan your bead pattern and colors before you start. This helps in achieving a cohesive look.
Pre-stretch the Elastic: Don't skip this step! It prevents your bracelet from becoming loose and saggy after a few wears.
Secure Knotting: Practice the knotting technique I shared to ensure your bracelets are secure and durable.


